Brilliant Chess Move: Stunning Bishop Sacrifice Led to Checkmate
Most chess players have experienced it at least once. You spot a free pawn, win some material, and feel confident about your position—only to discover that your opponent had seen something much deeper.
That's exactly what happened in this fascinating blitz game.
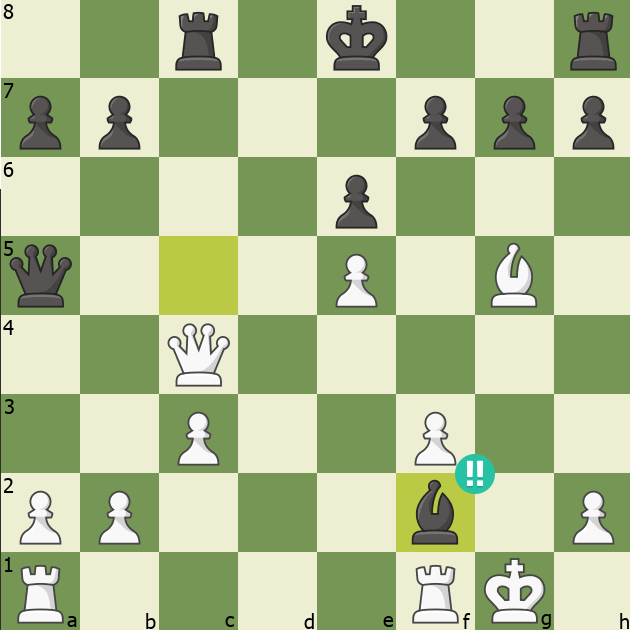
At first glance, White's move 16.Qxc4 looks completely reasonable. The queen captures a pawn, centralizes itself, and appears to improve White's position. Yet hidden beneath the surface was a tactical idea that transformed the game instantly.
Black responded with a brilliant bishop sacrifice that exposed the white king and launched a devastating attack.
The move?
16...Bxf2+!!
What follows is a perfect example of why tactical awareness matters more than material count in chess.
The Opening Phase
The game began with a Sicilian Defense setup:
e4 c5
Nf3 e6
Nc3 Nc6
Bb5
White chose a Rossolimo-style system, aiming for positional pressure rather than entering the heavily analyzed Open Sicilian lines.
After several exchanges, Black accepted a doubled-pawn structure but gained active piece play in return. The position remained balanced throughout the early middlegame.
Then came an important strategic moment.
After:
Qd4 Bxf3
gxf3
White's pawn structure became damaged around the king. Although this weakness wasn't immediately decisive, it created long-term vulnerabilities that Black would later exploit.
Strong attacking players often understand a simple truth:
Weakening a king's pawn shield may not matter right away, but tactical opportunities tend to appear eventually.
In this game, that principle would prove decisive.
The Critical Mistake
The turning point arrived on move 16.
After developing actively, White played:
16. Qxc4??
The move wins a pawn and appears completely natural.
Many players would make the same decision without much thought.
The problem is that White became focused on material while overlooking the tactical possibilities surrounding the king.
Whenever pieces are lined up toward your king, it's essential to ask:
What checks does my opponent have?
Are there sacrifices available?
Can any of my defensive pieces be deflected?
White failed to ask those questions.
Black did.
The Brilliant Move
Black immediately unleashed:
16...Bxf2+!!
This move deserves attention because it combines several tactical themes at once.
The bishop sacrifice forces White to respond.
Declining the sacrifice isn't practical, so White played:
Rxf2
Now comes the point.
Black follows with:
17...Rxc4
Suddenly the tactical picture becomes clear.
The bishop wasn't sacrificed simply to win material.
It was sacrificed to:
Remove a key defender.
Expose the king.
Activate the rook.
Open attacking lines.
Create long-term threats against the white monarch.
This is one of the most common characteristics of brilliant chess moves.
They aren't random sacrifices.
They're investments.
Black gave up a bishop in order to gain a powerful attack and complete control of the position.
Why the Sacrifice Works
Many amateur players see sacrifices and assume they rely on calculation alone.
Calculation is important, but the underlying positional factors are often what make the combination possible.
Before the sacrifice, several conditions already favored Black:
1. White's King Was Vulnerable
The move gxf3 had weakened the kingside.
Open lines around the king frequently become tactical targets.
2. Black's Pieces Were Active
The queen, rook, and bishop all had access to important attacking squares.
A sacrifice works best when the remaining pieces can immediately join the attack.
3. White's Pieces Were Uncoordinated
Some of White's forces were far from the king and unable to help with defense.
This meant Black could attack faster than White could reorganize.
When these factors combine, tactical opportunities often emerge naturally.
Converting the Advantage
After the sacrifice sequence, the game continued:
Rd1
Black then grabbed another pawn with:
18...Qxe5
Although not the engine's strongest continuation, it maintained a significant advantage.
White attempted to consolidate:
Bd2
Rg2
Bh6
At first glance, White's bishop appears active and dangerous.
However, activity means little if your king is under a direct attack.
Black calmly improved piece placement:
21...Re8
Now every piece participates in the assault.
This is a useful lesson for improving players.
When attacking:
Don't rush.
Bring every piece into the game.
Many winning attacks fail because players become impatient and launch premature combinations.
Black avoided that mistake.
The Final Blunder
White's final error came with:
Rd7?
The rook looks active, but it ignores a direct tactical threat.
Black immediately ended the game with:
22...Qe1#
Checkmate.
The move is elegant because it demonstrates perfect coordination.
The queen invades on e1.
The king has no escape squares.
No piece can block the attack.
No piece can capture the queen.
The game ends instantly.
From the moment White played 16.Qxc4, Black's attack unfolded with remarkable efficiency.
Lessons Every Chess Player Can Learn
This game contains several valuable lessons for club players.
Material Isn't Everything
The biggest mistake White made was focusing solely on winning a pawn.
Many players automatically grab material whenever they can.
Strong players understand that king safety often outweighs material considerations.
Before capturing anything, evaluate the tactical consequences.
Always Look for Forcing Moves
Checks, captures, and threats should be examined before every move.
Black found Bxf2+ because the move was forcing.
Forcing moves reduce your opponent's options and often reveal hidden tactical opportunities.
King Safety Is a Long-Term Factor
White weakened the kingside earlier in the game and paid the price later.
King safety isn't always about immediate threats.
Sometimes weaknesses remain dormant until the right tactical moment arrives.
Active Pieces Create Tactical Chances
Black's sacrifice worked because the remaining pieces were well positioned.
Even brilliant combinations usually depend on prior strategic preparation.
Tactics emerge from good positions.
Coordination Beats Material
After the bishop sacrifice, Black's pieces worked together perfectly.
Meanwhile, White's pieces struggled to defend.
A coordinated attack can be worth far more than an extra pawn or even an extra piece.
Why Players Love Moves Like Bxf2+
Brilliant sacrifices capture the imagination because they reveal the creative side of chess.
Most players expect straightforward moves.
A sacrifice changes the narrative of the game.
Suddenly the focus shifts from material to initiative, from counting pieces to calculating threats.
The move 16...Bxf2+ is especially satisfying because it demonstrates a fundamental attacking principle:
When your opponent's king is vulnerable, don't count material first.
Count attacking chances.
Black recognized that the exposed king offered greater opportunities than any material imbalance.
That understanding led directly to victory.
Final Thoughts
This game is a perfect reminder that chess is often decided by tactical awareness rather than material advantage.
White believed 16.Qxc4 won a pawn.
Black saw something deeper.
The brilliant bishop sacrifice 16...Bxf2+!! transformed an ordinary middlegame into a winning attack and ultimately produced a beautiful checkmate with 22...Qe1#.
Next time you're tempted to grab a pawn, pause for a moment.
Ask yourself what your opponent is threatening.
That simple habit may save you from becoming the next victim of a brilliant move.
Where to go next
For more attacking patterns like this, use the Chess Tactics and Strategy Library.
From the same category
Keep reading

Why Your Chess Accuracy Drops After Move 15
If your chess accuracy drops after move 15, the problem is not that you suddenly become a worse player. The problem is that the game has shifted from memory to understanding, and you have not trained that transition enough.
Why You Always Get in Time Trouble (And How Stockfish 18 Fixes It)
Every chess player knows the feeling. You navigate the opening perfectly. You transition into a solid middlegame. You build a completely fine, perhaps even slightly superior, position. And then, you glance at the clock. Your opponent has 15 minutes left. You have 42 seconds. Panic!
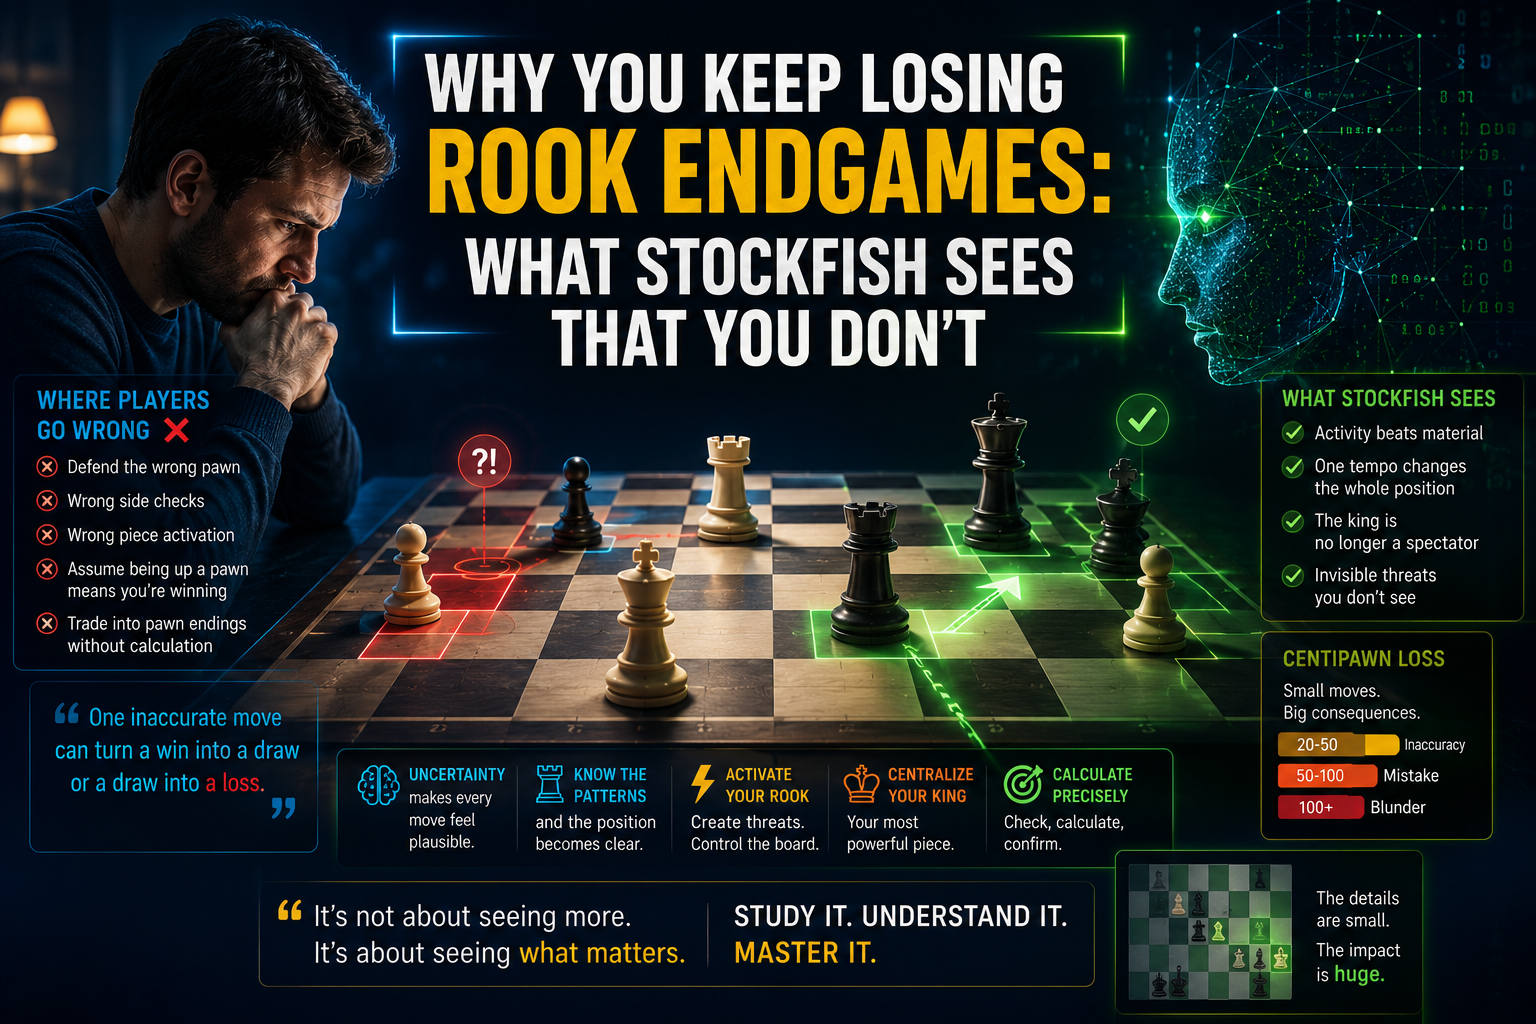
Why You Keep Losing Rook Endgames: What Stockfish Sees That You Don’t
If you keep losing rook endgames, the issue is usually not talent. It is pattern recognition. Once you learn to see what Stockfish sees, your endgames stop feeling random.